 |
|
 |
|
|
|
|
|
Remote Access and Debugging
This topic is a crash course in accessing remote devices on the QNX operating system. For new QNX developers, it is an essential quick start to remote development. The techniques in this section are directly applicable to every day QNX development.
Part 1: Remote Access
To enable almost all of our networking software, io-net networking service must be started. This service is active by default on QNX RTP machines as well as the default installation of the iPAQ Reference Platform. Each networking client or server connects to io-net to efficiently interoperate on local and remote network. Once this connectivity is put into place, you can frequently skip the process of burning or flashing your device. Instead, you can run your applications over your ethernet connection.
Here a brief overview to enable you to use our remote access technologies:
| QNet
If you are developing with QNX RTP, you may want to use our native networking protocol, QNet. With QNet you can communicate between remote processes without TCP/IP, access remote file systems and directly communicate with hardware on remote devices. It is designed to be a lightweight service for local area networks. QNet is enabled by default of QNX RTP machines as well as on the iPAQ Reference Platform. Once a PCMCIA card is inserted into an iPAQ sleeve, the appropriate TCP/IP, io-net and QNet drivers are active as well a DHCP client, used to resolve your network information. Once started, each QNet device will be mounted under the /net directory. From here, all QNX devices running QNet will be accessible. Please read our complete documentation to understand the nature of QNet. It is perfect for pervasive devices, distributed computing and other shared services.
If QNet is started but you do not see any device under /net, you may need to manually set your hostname:
Mount File system via NFS
To start the NFS server on an QNX RTP machine:
To mount a shared NFS directory:
Mount Windows File system via
CIFS
To mount a shared windows directory:
Remote Display
To display a single process on a remote Photon server - only once:
To have all photon applications display remotely:
To clear the environment variable:
Ditto Display
To allow users to collaborate simultaneously and to optimize the data which is sent between the client and server Photon servers, we use a relay server. To connect we establish a ditto session. The relay service is started by the inetd network service daemon on both the iPAQ and the QNX Realtime Platform. Note: If you are using the Windows development environment, you may want to consider purchasing the Photon client for Windows, Phindows. Please contact our sales department for the latest price and availability for immediate shipping.The iPAQ Board Support Kit includes an iPAQ interface client for Photon Ditto. This will allow you to see nice presentation of the iPAQ hardware, around the ditto region. To start a basic ditto of a remote Photon environment:
To start an iPAQ ditto of a remote iPAQ session:
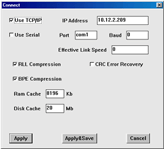
To start a phindows session from a Windows development environment:
Access via telnet
The default image from the iPAQ Software Reference Platform automatically starts the telnet daemon via the inted network service. By default there is only a single account, root, with no password. Feel free to use the passwd utility on the iPaq to change the password. To telnet into a device running inetd:
Access via Slinger (HTTP)
By default, your iPAQ includes default HTML documents which are accessible with a web browser. In the default iPAQ image, sliger is instructed to load its data from /system/data/html/www/. Slinger can run on any TCP port you specify. If you are not logged into the root account, you must run slinger on a port above 1024. Port 8080 is commonly used for non-root HTTP services. To simulate the iPAQ slinger configuration in the QNX RTP environment:
To connect to a local web server running on a specific port:
To connect to the web server running on a default iPAQ installation:
The QNX Utilities Reference has excellent documentation on the slinger web server. It goes into great detail about the SSI and CGI support. It can be an extremely powerful tool for anything from statistics to remote administration. Feel free to experiment and take advantage of this embeddable web server. |
Part 2: Remote Debugging
The pdebug program runs on your target device and attaches itself to either a character device (like a serial port) or to a tcp port. Once pdebug is running on the target device, gdb can to told to connect to the pdebug service. Once connected, you are able to attach to an existing process or start a new process to debug. At that point, you may continue debugging as if you were debugging a local process.
Important: You should have installed the C/C++ toolset for the arm processor. This installs a custom version of the GNU Debugger for the Strong Arm processor. With this, you will be able to connect to a pdebug service and debug programs compiled for an iPAQ.
To start pdebug, on your remote device, using TCP:
| Let's assume we want to pdebug to
listen to tcp port: 8000
Use this command to start the pdebug service: pdebug 8000 & |
To debug a process running on an armle device, such as an iPAQ, using TCP:
| Let's assume we want to debug the
program: /armle/usr/sbin/random
Let's assume we have an iPAQ with the domain name: ipaq.qnx.com Let's assume the pdebug server is listening on port: 8000 Let's assume the process on the iPAQ has the process id: 139283 Use this shell command to start the arm debugger: ntoarm-gdb /armle/usr/sbin/random Use this gdb command to connect to the iPAQ pdebug service: target qnx ipaq.qnx.com:8000 Use this gdb command to find the process-id of your process: info pidlist Use this gdb command to debug the process with the given process-id: attach 139283 This example results in an output which looks very similar to this:
From this point on, you can debug the remote process in the exact same way you would debug a local process. |
To start pdebug, on your remote device, using serial:
| Let's assume we want to use the
iPAQ's serial port: /dev/ser3
Let's assume we want to use the baud rate: 115200 Use this command to start the pdebug service: pdebug /dev/ser3,115200 & |
To debug a process running on an armle device, such as an iPAQ, using serial:
| Let's assume we want to debug the
program: /armle/usr/sbin/random
On our local machine, let's assume we want to use the serial port: /dev/ser1 Let's assume we want to use the baud rate: 115200 Use this command to start a local pdebug service: pdebug /dev/ser3,115200 Use this command to route the data from your serial port: stty baud=115200 < /dev/ser1 Use this shell command to start the arm debugger: ntoarm-gdb /armle/usr/sbin/random Use this gdb command to connect to the iPAQ pdebug service: target qnx /dev/ser1 |
Finally, you can also use gdb and pdebug to upload new binaries to your remote device. This allows you to install and test your programs without having to leave gdb.
To upload and debug a new program on a remote device:
| Let's assume you have started the
pdebug service and have connected gdb to your remote device.
Let's assume you want to upload and debug the program: test-app Let's assume you want to install it to: /tmp/test-app Use this gdb command to upload your program: upload test-app /tmp/test-app Use this gdb command to load the symbols to allow debugging: sym test-app Use this gdb command to start the program and begin debugging: run /tmp/test-app |
This concludes your introduction
to remote debugging and cross platform development. Please consult the
Reference Documentation on gdb, pdebug and Compiling and Debugging in the
QNX Help Viewer or on http://qdn.qnx.com/ for more in depth information
on these tools.
|
|
 Launch
the Phindows application and supply the IP address of the iPAQ.
Launch
the Phindows application and supply the IP address of the iPAQ.